

It’s a common occurrence that businesses often need to update the data in their CRM from information that they have received via a spreadsheet, but… the big question is what’s the easiest way to update the records?
In Sugar you have the option to perform a Mass Update via List View of the module, however, this is not always a viable option as the information due to be updated may not be the same for all records. Because of this, we suggest that updating via import is the most practical solution.
Follow the simple steps below to learn how to update via import in Sugar.
Step 1: Export Current Data
Establish which records from which module need to be updated. Once established, the record data will need to be exported. This can be done either via a ‘rows-and-columns’ Report or via modules ListView.
In our example, we are going to update Account records with an Industry value where there is currently no Industry value.
List View Export
Create a filter in Accounts ListView to show all Accounts where the Industry is empty.
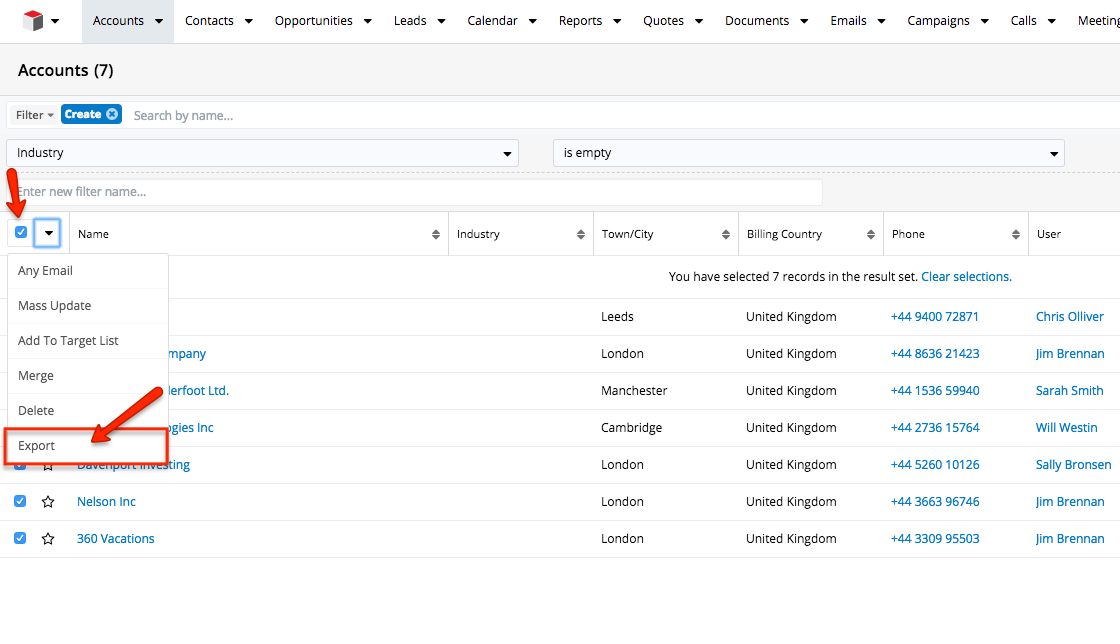
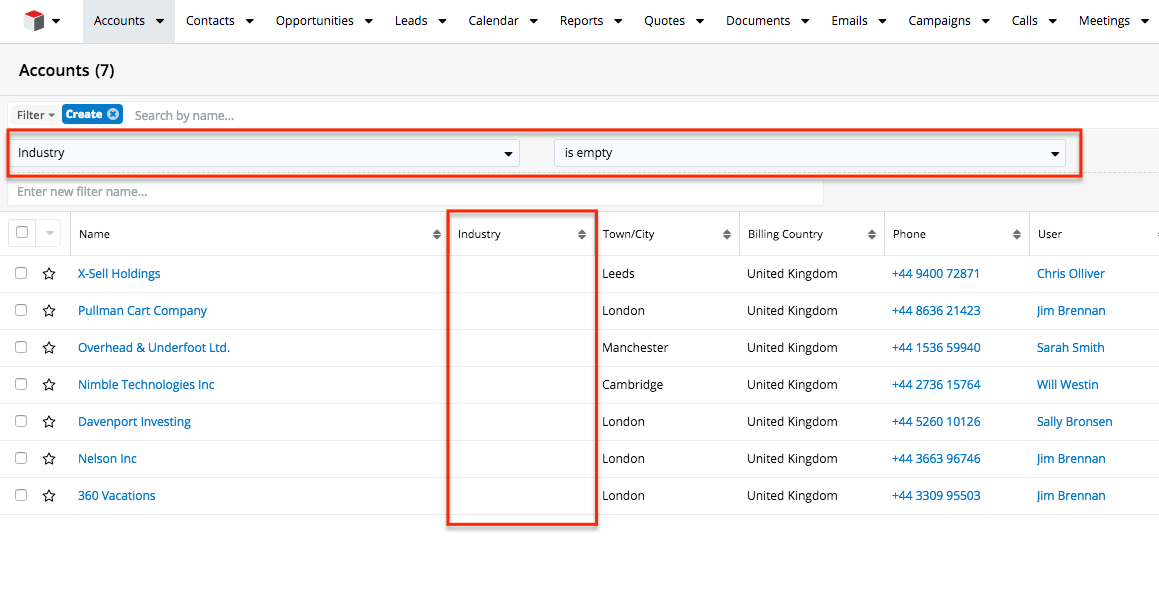 Then select all records that are shown and export them from Sugar.
 Report Export
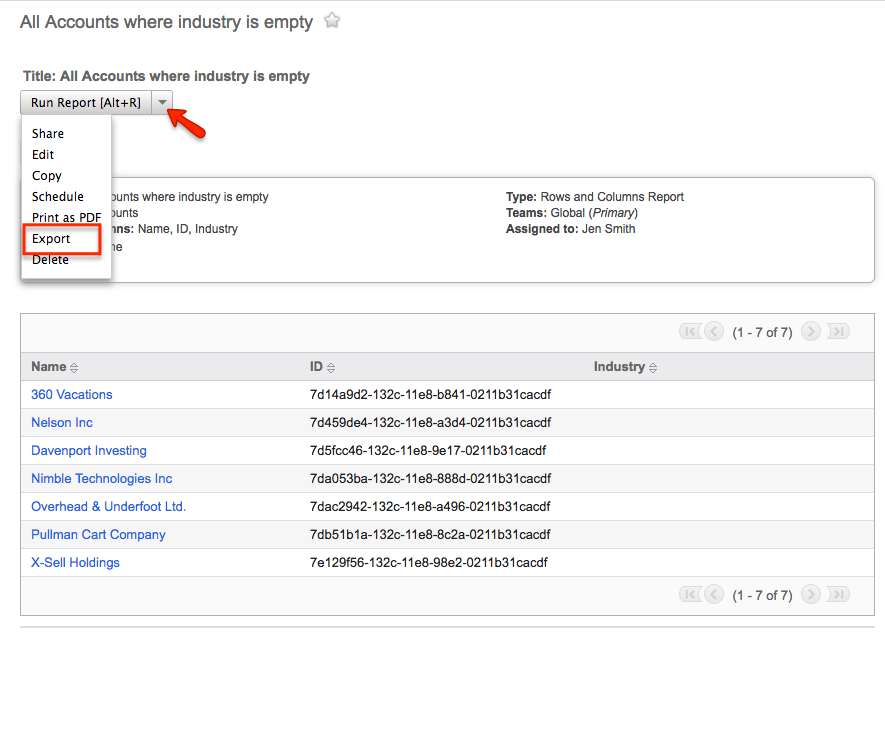
Create a ‘rows-and-columns’ report based on Accounts and define the filter as Accounts > Industry ‘Is Empty’, in the display columns select the Account Name, Account ID and the Industry field. The Account ID is needed so that Sugar can establish which records should be updated during your import later on. Always ensure you include all fields that are required during import (this information can be found in Studio > select the module > Fields > select a field > check if the ‘Allow Imports’ dropdown is set to ‘Required’).

 Save and Run the report and then Export from Sugar.
 Step 2: Prepare the file for Import
By default, the Account ‘Name’ is required in Sugar and should therefore be included in your import file. The Account ID will be needed as the ID is the unique identifier that allows Sugar to know which record should be updated and finally the field(s) that are being updated will need to be included, in this case, ‘Industry’. Any other field(s) that are not meant to be updated and are not required for importing can be excluded from the import file.
To clarify: For importing the file should be reduced to include only fields that are set to required for the module, the record ID and the field(s) that are being updated.
Step 3: Complete Import File
Update the file to show information that should be updated in Sugar via import and remember to save as a .CSV formatted file.
 Step 4: Importing the file
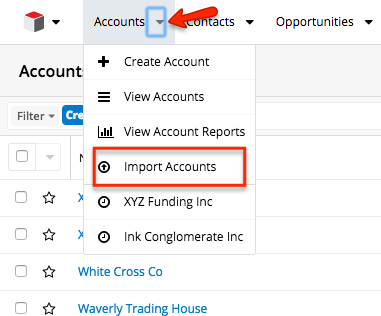
As in our example, we are updating Account records. Click on the dropdown arrow next to Accounts and select ‘Import Accounts’
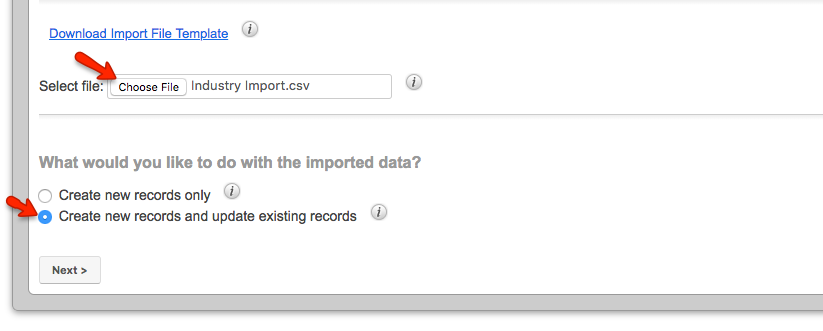
 Choose the file that you would like to import and as we are updating records, select ‘Create new records and update existing records’.
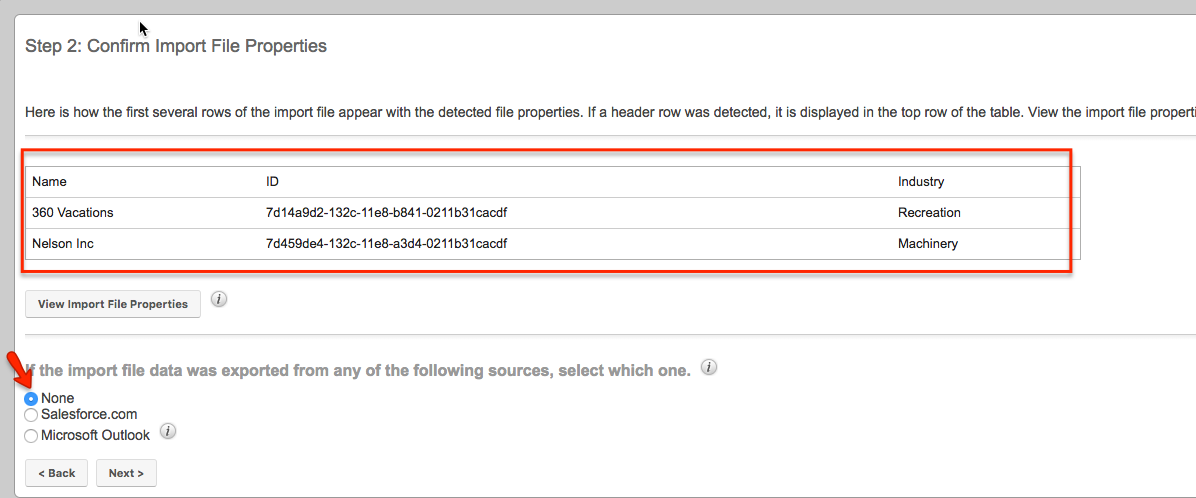
 Ensure that all information is showing correctly (you might also want to check the Import File Properties) and select None.
 Ensure that all fields are correctly mapped, please note fields marked with an asterisk must be mapped.
 At the next stage, we do not want to check for duplicates as the records already exist in Sugar. Leave the ‘Fields to Check’ column blank and select ‘Import Now’.
After the import Sugar will let you know how many records were created/updated and if any errors occured etc. For our example, we have 7 records updated successfully.
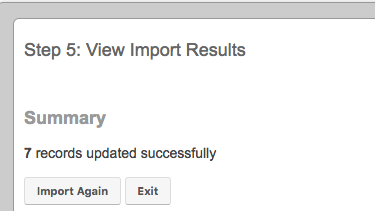 From here we can exit the import wizard as the records are now successfully updated.

If you would like further information on how to update via import into Sugar, please contact us using the below link.

 Update – Release Notes")