Reports can be created in Sugar to allow users to manage/generate data from various modules to produce vital information for their Organisation. There are four types of reports that can be built in Sugar (Rows and Columns, Summation, Summation with Details and Matrix). With the release of Sugar Winter ’19 (8.3), all report types can now be exported from Sugar as .CSV files. Exporting reports to .CSV files can allow further filtering/functions on the data from Sugar.
Reports can also be scheduled in Sugar, this means that based on the timeframe set, the report will be emailed to the user. In order for the user to receive the scheduled report they must have export rights, not only for the Reports module but for the module for which the data is based on. Without these access rights set via Role Management in Sugar, users will be unable to schedule a report to be sent to themselves.
When a report is sent it will be attached to an email as a PDF to the users Primary Email Address in Sugar.
Please Note: Reports that contain a chart in Sugar will not have a chart displayed in the emailed PDF version.
Requirements to schedule a Report
A personal outgoing email account must be configured by the user scheduling the report.
An outgoing mail server for the Sugar system must be configured by the administrator.
The “Run Reports Generation Scheduled Tasks” scheduler must be activated by an admin user.
Please Note: Scheduled Reports may arrive after the set time based on the cycle for the Run Report Generation Scheduled Task set by an administrator in your system.
How to schedule Reports
- Navigate to the Reports module and create a new schedule via one of the below methods:
- Open the Actions menu in a reports Detail View
- Select “Create Schedule”
Or
- In the Reports module tab in the menu bar click on the down arrow and select “Report Schedules”
- Click on the blue “Create” button at the top of the List View page.
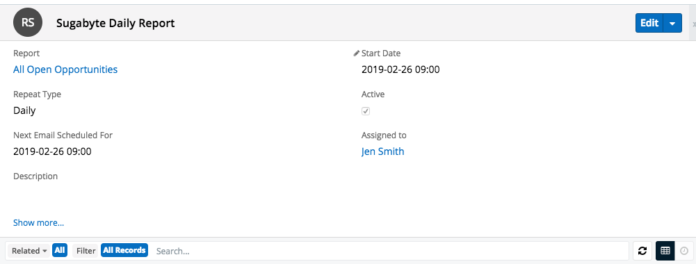
- Give the schedule a name such as “Sugabyte Daily Report”
- Select the report that you would like to schedule.
- Set the Start Date and Time that this schedule should commence
Once the report schedule has been created and saved, a “Users” subpanel will show beneath the Report Schedule Record View where further users can be linked if the report should be sent to multiple users.
Please Note: When scheduling a report, users can choose a start day, time and interval. However, if you are configuring the report to be sent for multiple users, Sugar will convert the time to UTC so that each user receives the report simultaneously regardless of time zones.
- Set the Repeat Type to how frequently the report should be sent
- Ensure the “Active” checkbox is set to True and save.
Please Note: If you would like to stop receiving the report at any time, access the Report Schedule and set the “Active” checkbox to False and save.


